Tuesday, November 23, 2021

The next clue…

 The mysterious blue suitcase.. collecting dust..

This is the final destination, get it or bust! 

Thursday, July 6, 2017

Review posts and I'm back again!

It has been like a million years since I've touched this blog.
The blogger app is no longer available, let alone updated, which is annoying because I do most of my internet on my phone, and blogger won't allow me to upload photos from my phone, well, it tells me to use the app, which crashes in like 5 seconds if I'm lucky. So, it's a real hell.

What's wrong with you blogger? Has it been entirely abandons by the world?

I'm thinking about doing some review posts on things I've purchased recently.
So, be prepared for that!

Saturday, November 2, 2013

Halloween 2013

Chocolate Cupcakes topped with chocolate ganache, sprinkled with crushed homemade chocolate cookies!
They were decorated with green coloured fondant shaped into brains and arms. The brains had jam spread over them too.. the chocolate skulls and pumpkins were from molds.


Wednesday, February 22, 2012

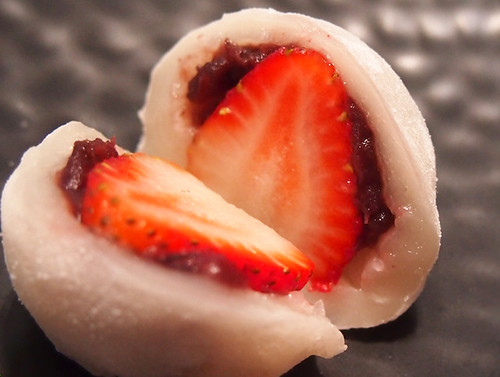
Easy Handmade Strawberry red bean Mochi


Ingredients:
  • 1 cup glutinous rice flour
  • 1 cup water
  • icing sugar (to taste)
  • 1/2 cup cornstarch for dusting
  • Fresh strawberries (a handful, or a punnet if you want extras to nibble on)
  • 1 packet of premade red bead paste (from Asian Grocery stores, this will be more than you u can use)

Instructions:

  1. Sift the icing sugar into the rice flour and mix with the water into a microwave safe bowl.
  2. Nuke the sucker for a minute at a time and stir it between nuking sessions
  3. Once in come out of the microwave, it will be really hot. Be Careful! Prepare a plate or space for the bit. Dust the work area with the cornstarch as well as your hands. Spoon out about a tablespoon of the sticky dough and dust it. You'll need to kind of stretch the dough gently into a round disc.
  4. Dollop a small amount of red bean paste onto the centre and put a strawberry tip first into the red bean.
  5. Pull and stretch gently the dough to cover the strawberry. Dust some more and place onto a plate.
  6. And Voila!

Note: For a plain red bean mochi, the red bean is normally a bit tooooo soft to play with. It'll be better to chill a slab in the freezer and then cut them into bite size chunks and then wrap in the warm sticky glutinousy goodness.
Tuesday, February 14, 2012

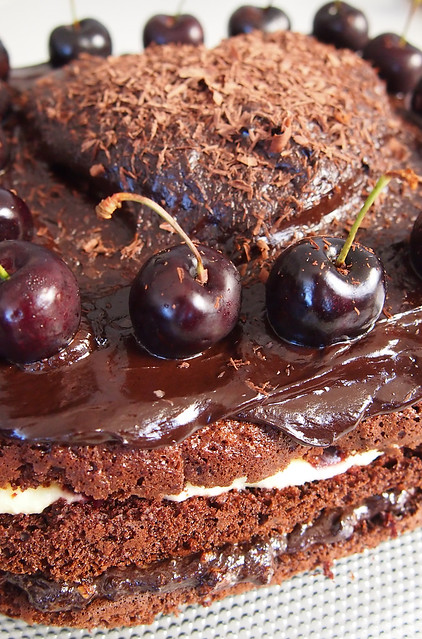
Black Forest Gateau


My 2nd attempt at a black forest cake from Masterchef Australia.
Nevermind that mine has less layers than it was supposed to.... it was still ridiculously rich and delicious~! Notice the heart in the middle ^_~

Ingredients

For the chocolate sponge
7 eggs
250g caster sugar
200g plain flour
50g cocoa powder
2 tsp baking powder
1 tsp vanilla extract


For the candied cherries
½ cup semi-candied pitted cherries, ¼ cup juice reserved
¼ cup caster sugar


For the cherry compote
1/3 cup caster sugar
600g pitted fresh cherries, halved
1 tbs brandy

For the cherry sugar syrup
90g caster sugar
¼ cup cherry juice

Method

1. For the chocolate sponge, preheat oven to 160°C fan forced. Grease and line 2 x 20cm springform cake pans.


2. Add eggs and sugar to a heatproof bowl of an electric mixer, and set over a saucepan of simmering water over very low heat. Whisk the mixture until 37°C. Remove the bowl from the heat and beat with an electric mixer on a medium-low speed for 5-8 minutes or until the mixture has cooled and thickened to a mousse-like consistency. Sift the flour, cocoa powder and baking powder together twice. Using a large metal spoon, fold the dry mixture into the egg mixture in 3 batches until combined, adding the vanilla extract with the first dry batch.


3. Pour the mixture into the lined cake pans and smooth surface. Bake for 20-25 minutes or until sponge springs back when lightly touched. Allow to cool for 10 minutes in the pans, then turn out onto wire racks. Place in the blast chiller for 10-15 minutes until cake has cooled completely.


4. For the candied cherries, preheat oven to 120°C. Place cherries on a lined baking tray. Lightly dust with the sugar and place in the oven for 50-60 minutes. Remove and cool. Coat with remaining sugar. Set aside.


5. For the cherry compote, add the sugar to a non-stick saucepan and place over medium heat. Once the sugar begins to dissolve add the cherries and cook until they start to release their juices. Add the brandy and cook for 10-15 minutes or until the liquid has reduced and thickened. Strain, reserving liquor.


6. For the cherry syrup, heat 170ml water and the sugar in a small saucepan and bring to the boil, stirring constantly. Remove from the heat and stir in the reserved cherry juice and compote liquor. Allow to cool.


7. For the chocolate hazelnut praline mousse, line a baking sheet. In a dry heavy-based saucepan, cook sugar over medium heat, stirring, until melted. Once melted, cook without stirring, swirling pan, until lightly golden. Add hazelnuts, stirring until well coated. Immediately pour mixture onto the baking sheet and cool completely, in blast chiller for 5 minutes. Break praline into pieces. Place into a food processor and pulse until finely chopped. Set aside.


8. Melt the chocolate in a heatproof bowl set over a pan of simmering water. Whisk the egg yolks in a small heatproof bowl. Heat 250ml of the cream in a small saucepan over low heat. Stir through half of the hot cream into the egg yolks. Return the mixture to the saucepan over low heat and stir until thickened. Strain into a clean bowl. Stir the melted chocolate into the hot custard. Add the vanilla and allow to cool. Whisk the remaining cream until stiff peaks form. Fold into the chocolate mixture with the praline, until just combined. Set aside.


9. For the mascarpone cream, beat the mascarpone, vanilla and sugar in a bowl until smooth and slightly thicker in volume.


10. For the chocolate ganache, melt the chocolate in a heatproof bowl set over a pan of simmering water. Set aside. Bring the cream to just below boiling point in a small saucepan. Remove from the heat, then add the melted chocolate and stir until smooth. Allow to cool until thick but still pouring consistency.


11. To assemble the cake, slice both cakes into thirds. Place the base of 1 cake onto a serving plate and brush with some of the cherry syrup. Spread over half of the chocolate praline mousse.


12. Place the next layer of cake onto a board, and brush with cherry syrup. Spread over half of the mascarpone cream. Divide the cherries into two parts for two separate layers. Place cherries around the border of the cake, 5mm from its edge and scatter remaining in the middle. Carefully remove layer from the board and place on top of the first layer. Repeat each layering process on the board (you will have 1 spare slice of cake), starting with the praline mousse and ending with the cherries on the mascarpone cream.


13. Place the final layer of the cake on a wire rack sitting over a baking tray. Evenly pour the ganache over the cake, ensuring it is completely coated. When the ganache has set, place on top of the layered cake. Decorate with shaved chocolate, fresh cherries and candied cherries.


For the chocolate hazelnut praline mousse
½ cup caster sugar
½ cup hazelnuts, toasted lightly and skinned
300g chopped dark chocolate
3 egg yolks
300ml thickened cream
1 tsp vanilla extract


For the mascarpone cream
500g mascarpone
1 tsp vanilla bean paste
2 tbs icing sugar

For the dark chocolate ganache
150ml cream
200g chopped dark chocolate

shaved chocolate
fresh cherries

Wednesday, February 1, 2012

2012 Already~

Happy New Year~!
I can't believe I am already into the 2nd month of 2012...
And I cannot believe that this blog was stagnant for a whole year... well, I could, there was so much to deal with in terms of... well .. life.
This year, I hope to start afresh... without actually starting a new blog. However, I hope that rather than just food, it will also be about my other creative (and not-so-creative) endeavors.

So, Let me start off today with the weapon of choice - A camera.
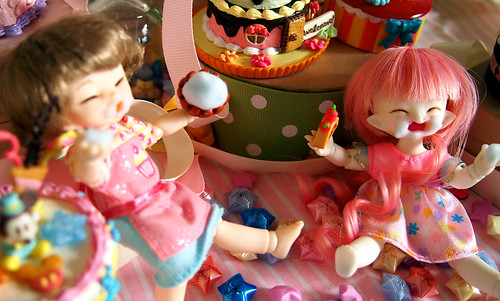
I love Re-ment miniatures and I love Fairyland's Pukipukis.
This was taken for a Ball-Jointed Doll photography competition.
I realise now, I do not have much spare room in my bedroom to even set up a doll sized room, let alone a doll house...so I borrowed my sister's desk. So miniature cakes, mini handmade bunting, handmade stars, fabric, ribbon, boxes and a glass candle holder later, voila!
There was much more elements to the whole scene, but I found it difficult to capture.
There was also some shaving cream involved as I had always wanted to do a cake face shoot, I am a bit weary of what I put on my dolls as oils and chemicals may affect their resin. I am not certain if this achieved my idea of an over-indulgent-love-of-cake scene, but it is so bright and colourful, I like it.

Monday, December 6, 2010

Season's greeting


Merry Christmas my dears~
Pandan & Coconut Christmas Cookie Tree

Recipe:
450g self raising flour
165g caster sugar
185g butter, chopped at room temperature
2 eggs
1 tsp pandan essence

150g Icing sugar, sifted
1 tbps Coconut Cream

Silver Cachous
More icing sugar to dust

1) Process flour, sugar and butter until crumbly. Add eggs and pandan essence and process until combined.
2) Knead dough on floured surface and cover and chill in the fridge for about 1 hr.
3) Divide dough in half and roll out onto baking sheets. Chill for 30 minutes.
preheat oven to 180°C/160°C fan forced.
4) Using the different sized star cutters, cut two of each size for one tree.
5) Bake the smaller three stars for about 10 minutes, and the larger stars for 12 minutes.

Icing:
1 tbsp Coconut cream
150 g icing sugar

1) Sift the icing sugar through a fine sieve into a bowl.
2) Add the sugar a spoonful at a time into the coconut cream and mix. Keep adding until you feel that you have a suitable consistency for piping.

Assembly:
1) Pipe some icing onto the surface of a plate, place largest star on the icing. Join the rest of the stars, largest to smallest in this way. Save the smallest star.
2) Pipe a dot of icing on the tips of the stars, and add a silver cachous. Do this with the smallest star and once it has hardened, stand it up on the top of the tree with some icing.
3) Dust with icing sugar.

Friday, November 19, 2010

Gluten Free Strawberry Scones


Gluten Free Strawberry Scones (+Healthy!)
Note: This is what I used, the mix turned out really sticky, so maybe less milk or more flour...

Ingredients
2 gluten free plain flour plus extra for dusting
1/3 cup raw sugar
2 teaspoons baking powder
2 large eggs
1/2 cup light cream cheese (at room temp)
1/4 cup light milk
1 teaspoon vanilla extract
pinch of salt
2/3 cup strawberries, hulled and quartered

Method:
1. Preheat the oven to 200°C, line a large baking tray with baking paper.
2. Sift flour and baking powder together in a large bowl. Add sugar.
3. In a separate bowl, beat the egg, cream cheese, milk and vanilla extract until there is no lumps.
4. Pour into the flour mix and stir.
5. Add strawberries and stir it through.
6. Here's the fun part, since mine was too sticky, I skipped all the shaping part and just slapped a blob of scone sized dough onto the baking paper.
7. Bake on the middle rack for about 20mins or until golden.
8. Cool on wire racks, then remove from the paper.

Would probably taste better with buttermilk and butter instead of low fat stuff.... but oh well...
Best eaten fresh! and warm!

(Unhealthy part) Maple Syrup butter!!
Ingredients:
50 grams Unsalted butter (at room temp)
1 Tbs Maple Syrup (or to taste)

Method:
Mix together with a fork until well combined, and serve with scones!
Will probably work well for any other scones,... buttermilk scones... mmmm....


Saturday, October 30, 2010

Mango Mango Mango~


My attempt at a mango, coconut, sago and pandan dessert.
Sadly the sago was undercooked. Oh well, it's learning.


Mango and macadamia cupcakes
The topping is white chocolate and mango ganache and coated with chopped macadamia (i originally wanted to make truffles, but that didnt turn out so well... but what better way to solve the problem of overly runny ganache by topping cupcakes with it)

Thursday, August 26, 2010

Ginger Brulee Tart


Recipe from the Bourke Street Bakery Cookbook
If you haven't been to the bakery, you should! And if you only buy one thing, it should be a brulee tart, either the Strawberry and Vanilla or the Ginger.
The pâte sucrée they make is amazing! So thin and crisp. It's absolutely to die for.
Mine didn't turn out so death-bringing, it was crisp, but not as thin, and it's possible I may have overworked the dough.
This has a very strong ginger taste, not for people who don't like sweet ginger food.
Mine didn't brulee very well as I don't have a blow torch, using the grill just didn't have the same effect.

Sunday, August 22, 2010

Cheese Blintze


Found the recipe in Nigella's "How to be a Domestic Goddess"
It turned out pretty good, I'd be just satisfied if it was all cream cheese filling instead of cream and curd cheese :p
I also used mixed berries to make the compote. Yummy and bloody looking.

Monday, August 16, 2010

Jasmine Green Tea and White Chocolate Macaron


Once I tried the White Chocolate and Jasmine Green Tea Macaron at La Renaissance Cafe, I was in lurvvvvve~!
I had to give this a shot myself.
Unfortunately, macarons have always been difficult for me. This Just didn't want to work. Three batches of macaron. None of them successful.
However, I feel that 160°C for 18mins might be the optimal temperature for my oven.
The recipe said let it sit for 1 hour, i think it might have been too long and the recipe was also rather dense. I will try a different recipe next time, without as much sugar and almond.

The White Chocolate Ganache filling recipe:
200g White Chocolate, chopped.
150ml Cream (35% fat, not that it makes much difference in this case, but it just so happen to be the cream i had.)
2 teabags of Jasmine Green Tea

  1. Heat the cream in a small pot. Once it starts to simmer, drop in the tea bags and let them brew. Using a teaspoon to press the bags every so often until you are satisfied with the strength of the tea.
  2. In the meantime, melt the white chocolate in a large heatproof bowl sitting about a pot of simmering water, make sure the bowl doesn't touch the water. Remove from the heat once all the chocolate is melted.
  3. Pour the cream into the white chocolate and whisk to mix.
  4. Cover with plastic wrap and refrigerate until needed (I should thicken up by then)
  5. Once cooled, whip it up and spoon it into a piping bag , I don't use any piping nozzle, just cut the tip off and pipe onto one macaron and sandwich with another.

Monday, August 2, 2010

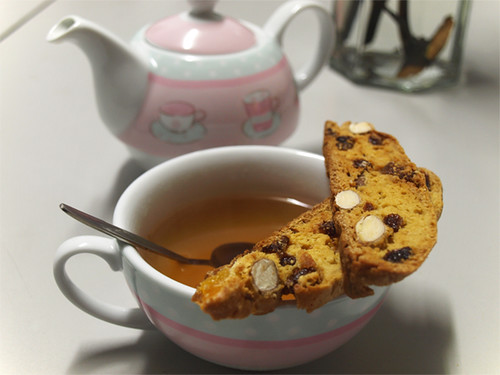
Biscotti!


Biscotti can be addictive. Learning this after buying my first bag of biscotti not long ago and no matter how I try, I was unable to stop eating it. Before you know it, the entire bag was gone!
Lemongrass and Ginger, I believe it was. It doesn't matter, because the subsequent bags of different biscottis bought were all just as addictive.

So, of course, I have to give it a go.
This recipe contained dried fig, dried apricot, sultanas, almonds and hazelnuts.
It did turn out a little bit wrong. My original roll was much too large so it didn't cook properly (I didnt realise), so when it came time to slice it up for the second baking, it was a little bit difficult.
But despite that, it was oh so yummy. I kept eating as I was baking each batch of biscotti (one cookie tray, large biscottis). I still ended up with a fair bit.
It took one day for all of them to disappear. I am very happy that it was that well recieved.
Another thing, I love my new lil tea-for-one teapot and cup set!
Cute isn't it?

Sunday, July 25, 2010

Gary Mehigan's Black Forest Cake


*Gasp!* No photo!
It was a challenge and it came out quite messy. I can see why the contestants on Masterchef would have trouble especially given the time limit that they are given.

Taste was a bit too dark chocolately to me, but well received by everyone else who tried it.
And yes, I did add the more than recommended amount of alcohol ;)
The thing that everyone said 'made the cake' was the Hazelnut Praline mousse. It gave the cake a new dimension. I love the cherry compote, I love little bits of fruit in my cake!
My candied cherries failed, so I didn't use those for garnish :(

I will definately try this cake again and hopefully get it right and photo-worthy.

Sunday, July 18, 2010

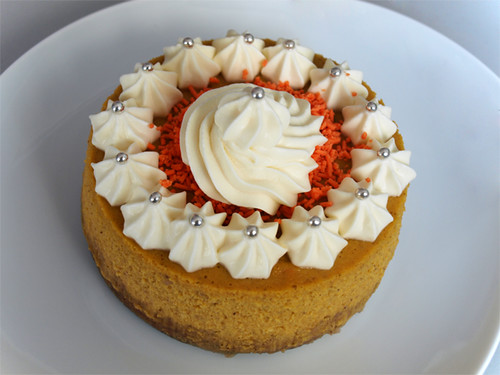
Pumpkin Cheesecake~


Maybe it seems normal in the US, but the thought of it seems strange to me, and to the people I fed this to.
However, I was surprisingly well received, except for one person who said it tastes like mashed pumpkin baby food.
The flavours and the spices worked really well and the Chantilly+brandy cream to top it off worked very well too. To me the pumpkin flavour was very subtle (obvious to some people, not subtle enough). I actually used freshly mashed pumpkin for this recipe, when it said canned pumpkin. It turns out freshly mashed pumpkin needs to be further reduced to get rid of the water content, so that is probably why the flavours were so subtle.
I will definately make this again!!

Friday, July 9, 2010

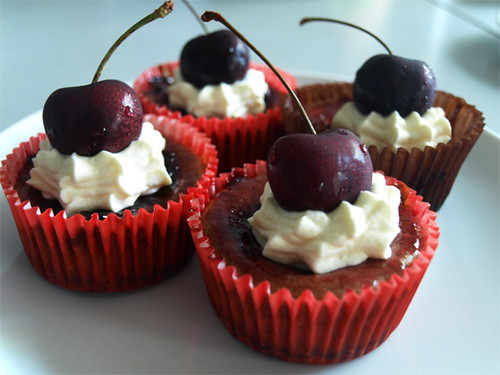
Blackforest Cheesecake


This was incredibly well received. I absolutely loved it as well!
So? I cheated and used cherry jam, but boy did that cherry jam give it a sugary kick!
I also used the Black Forest Timtam biscuits for the base.
And Kirsch, the more the better ;)
And Hazelnuts! Lots of it.
And topped with Chantilly cream and fresh cherry!
Oh yeah~!

Recipe adapted from: kraft.com.au
Base:
  • 1 pack of Arnott's Blackforest Timtams
  • 40g butter, melted
  • 4 tablespoons chopped toasted hazelnuts

Filling:
  • 500g block PHILADELPHIA Cream Cheese, softened
  • 3/4 cup caster sugar
  • 2 x 55g eggs, lightly beaten
  • 100g Côte d'Or Dark 86%, melted
  • 1/3 cup cream
  • 4 tablespoons Kirsch (cherry brandy)(optional)
  • 1/3 cup chopped toasted hazelnuts, extra
  • 2 × 425g cans pitted cherries in syrup, drained (syrup reserved)
Topping
  • 5 tablespoons Cherry jam
  • 5 tablespoons reserved cherry syrup
  • 250 ml heavy cream
  • 2 tablespoons sifted icing sugar
  • 1 tsp vanilla extract
  • 1 tsp kirsch

  1. COMBINE biscuit crumbs, chopped hazelnuts and butter. Press into the base of cupcake patty cases.
  2. BEAT the Philly and sugar using an electric mixer until smooth. Beat in the eggs, one at a time, until well combined. On low speed, beat in the chocolate, cream and kirsch until smooth. Stir in the hazelnuts and half the drained cherries.
  3. POUR into prepared base and bake at 150°C for 25 minutes, until just wobbly in the centre. Allow to cool in oven with door ajar. Chill for 2 hours.
  4. SIMMER the jam and reserved syrup in a saucepan until the jam is melted and it becomes a thick syrup, cool. Spread over the cooled cupcakes.
  5. WHISK the cream with icing sugar, vanilla extract and kircsh until soft peaks form.

Friday, July 2, 2010

Coke Cupcake?!


CocaCola Cupcake?!
Yup, when I saw this recipe, I just had to try.
However, I was very disappointed at how subtle the coke taste was.
It wasn't bad, it's just that the cocoa overpowers the whatever coke flavour there was. So I ended up mixing up an icing that was almost entirely coke and icing sugar to try to bring out the coke taste.
If I try this again, I will somehow try to find a way to concentrate the coke flavour.
Maybe less cocoa? That make lose the dark colouring...
Pondering... pondering...

Saturday, June 26, 2010

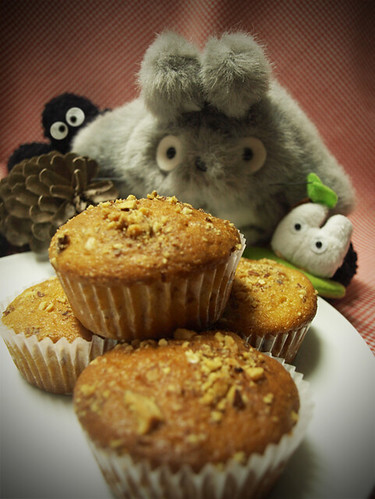
Peach Yoghurt & Almond Muffins

Something a tad bit healthier~
I had all the ingredients at home so, I decided to give this a go.
So not as sugary and rich as what I usually crave but it was still nice.
I loved the photo, I am not sure why I posed it with Totoro though. I think the chibi totoro plush caught my eye and so I decided to grab the crew and make this photo.

Saturday, June 12, 2010

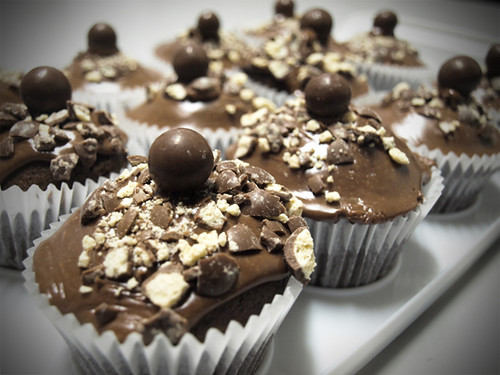
Malteasers Cupcakes


This is a choc malt cupcake with a choc malt ganache decorated with crushed malteasers. How can this NOT be a Malteaser Cupcake?
To be honest, it isn't as sweet and rich as it looks. Which to some people it is good, while to me and another taster, it doesn't pack that punch that was expected.
Having said that, I do have an incredibly sweet tooth and it is probably for the better that I make things that isn't as sugary as I would like.

Friday, April 16, 2010

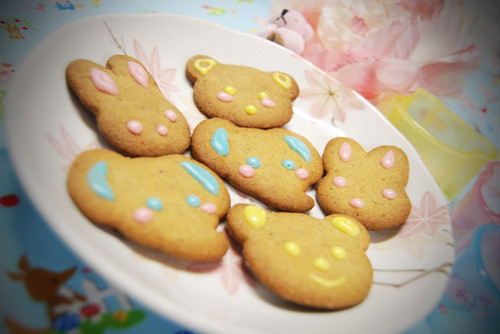
Speculaas~!


Spice Cookies, or Windmill cookies, or Spekulatius, whatever you may want to call it.
It was only recently that I tried these cookies for the first time, and I got hooked. So of course I had to try it out for myself.
To be honest, I have never used any of these ground spices (except cinnamon) before so the flavours were all new and surprising to me. I guess that was why I was so taken by these cookies.
Cinnamon, nutmeg, cloves and ginger. What a lovely combination.
Mine didn't turn out as thin as the ones I tried but the flavours were all there. Cut with some animal shaped cutters - Bunnies, Bears and Elephants! And decorated with icing.
I was quite happy with the end result. I must say, they turned out quite cute.
Will definately give it a go again.